
5 Ways Other James Hardie Contractors Cut Corners
If you’re thinking about James Hardie fiber cement, then you probably already know how durable and beautiful Hardie siding and trim can be on a home exterior. What you might not realize is that not every contractor uses the right accessories to make sure that your finished project looks just as good as all the ones in the marketing brochures (and lasts as long as it’s supposed to).
Here are 5 of the top ways that “the other guys” cut corners to save a few bucks on the installation:
1. Use cheap, un-tested siding nails
Most contractors don’t even think about what type of nails to use when installing Hardie siding. Usually, contractors just order their nails with their siding package from the supplier that they order from. Unfortunately, this means that they use whatever nails the store happens to keep in stock (usually the cheapest ones money can buy).
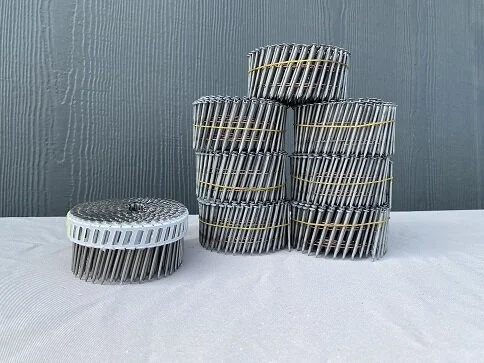
You could buy 7 coils of the cheap nails for every coil of nails that we use
What’s wrong with the cheap nails?
When we looked into the testing for these cheap nails, the only standardized test document that the nail manufacturer could offer us was for the galvanized coating. When it came to testing on strength or pull-out resistance, they had nothing at all. They are basically welding bulk nails onto a coil and calling it “good enough”.
We only use these nails for installing rigid insulation panels prior to installing siding on top.
The best nails for james hardie siding
We use stainless-steel, ring shank coil nails to install James Hardie siding. We will use wire-collated nails if we have to, but we prefer plastic collated nails because they don’t spark and mark the boards like wire nails can.
We make sure that our nails meet ASTM and ICC standards for shear strength and pull-out resistance, and the stainless-steel finish means that they wont ever rust. They cost us a lot more than the market standard, but we believe that no-one should compromise on the quality of the nails that are holding their fiber-cement siding to the wall.
2. Don’t Bother Sealing the Windows
When we replace a customer’s siding, their home almost always has renovation windows that don’t include a built in nailing fin. This means that the window sits in the rough opening with nothing but sprayfoam or silicone sealing against water. Most siding contractors do most of their work with new home construction, where they deal with nail fin windows every time.
The right way to detail a window in a renovation project is to install peel & stick tape from the window frame right to the plywood or OSB sheathing. This makes sure that any water that might somehow find its way behind the house wrap doesn’t penetrate the framing of your walls and cause significant rot damage. After this, a good house wrap should be installed and taped to the window opening, keeping water from entering from the exterior.
New construction siding contractors never do this. If you’re lucky, they’ll tape the house wrap to the window. Some contractors don’t even do that much.
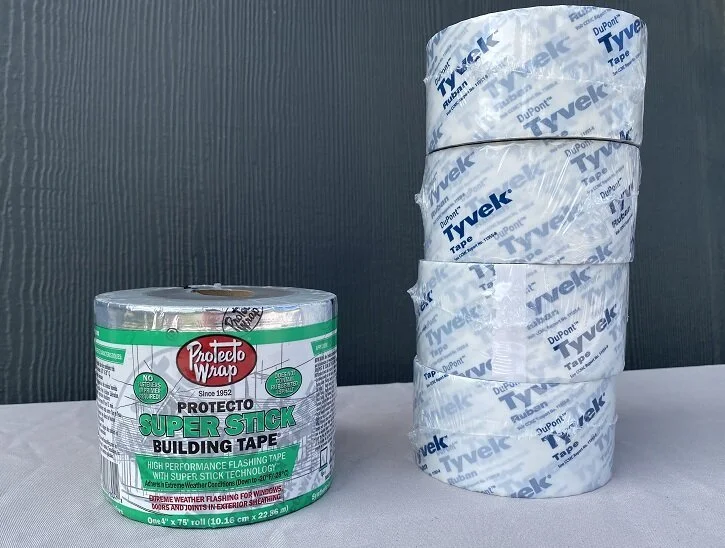
For what it costs to buy 75 feet of peel & stick tape, we could buy 864 feet of regular Tyvek tape
We use Protecto Super Stick tape because it stays sticky in super cold temperatures: all the way down to -28 Celsius! It also has an easy-to-use split backing, which means that no matter what time of year we are working on a project, we can properly seal your windows against future leaks.
3. Pepper the trim boards with face-nails
James Hardie first started producing their HardieTrim tabs in the early 2010s, but some contractors still haven’t caught on.
HardieTrim tabs allow us to install HardieTrim around windows and at corners without having to use a face-nail as the primary fastener. This reduces the amount of face nailing in our HardieTrim projects by about 90%. Fewer face-nails means fewer nail-holes, fewer touch ups, and an overall better looking installation.
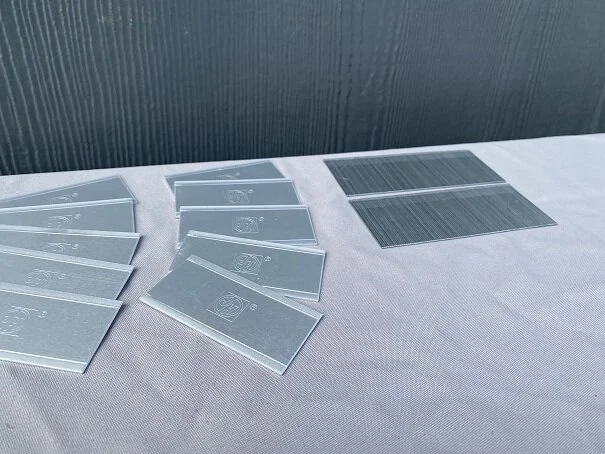
For the same amount of money, we could buy four Hardie Trim Corner Tabs (enough to install 6.5’ of 4” Hardie Trim corners) or 200 16 gauge finish nails (enough to install 50’ of the same corners).
It costs us more to do it this way, but it’s definitely worth it: when installing 4” HardieTrim without the tabs, James Hardie requires a minimum of two 16-gauge finish nails every 16”. This means that on a typical house with about 300 linear feet of trim, you should expect to see about 450 nail holes on the trim boards alone. That’s a lot of nail holes!
4. Cheap out on the weather barrier
The house wrap under the exterior cladding on a home is one of the most important parts of the project. Unfortunately, because it isn’t visible after the job is done it doesn’t get nearly enough attention. Tyvek HomeWrap is the market standard, but some contractors use a cheap alternative: 20-minute tar paper.
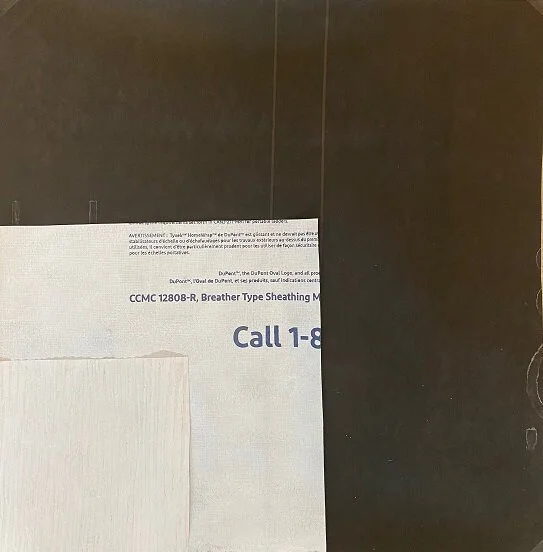
Amazingly, black tar paper is still available to purchase today, and some contractors will actually use it! The fact that tar paper is less than half the price of Tyvek HomeWrap probably has something to do with it.
Tar paper is much less flexible than Tyvek, which makes it more difficult to work with, particularly around corners. This forces installers to use more staples, and therefore punch more holes, just to get the paper to stay on the wall. This gets even more difficult during cold or windy weather.
The extra holes and rips at corners are especially problematic with vinyl siding, as prevailing winds will drive rain down the siding and into the outside corner posts. As the years go by, the constant wetting and drying at the corners will cause the tar paper to break down, which will lead to damage in the wood sheathing and framing.
Under perfect conditions, tar paper can still work well as a moisture barrier. In practice, however, it just doesn’t work as well as newer styles of building paper.
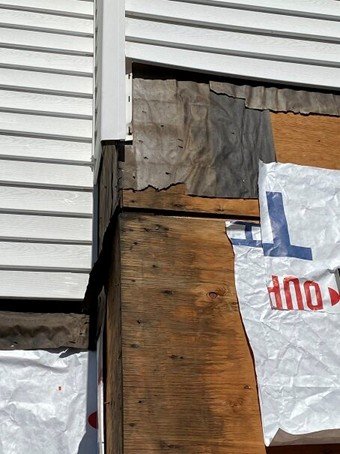
The tar paper on this chimney chase was falling apart when we removed the siding.
5. Use plastic accessories made for vinyl siding
Have you ever heard the old saying: “the devil is in the details”? The smallest details can absolutely make or break a James Hardie exterior. One of the most obvious examples of this is the mounts a contractor uses for lights, plugs, and hose bibs.
The most common mounts used on siding projects are two-piece vinyl “J-blocks”. The installer nails the back plate to the wall, installs siding up and around the mount, and then clips the top plate in. This system works perfectly for vinyl siding, because it provides a solid, flat surface to mount to while significantly reducing the amount of trim-work required in the prep.
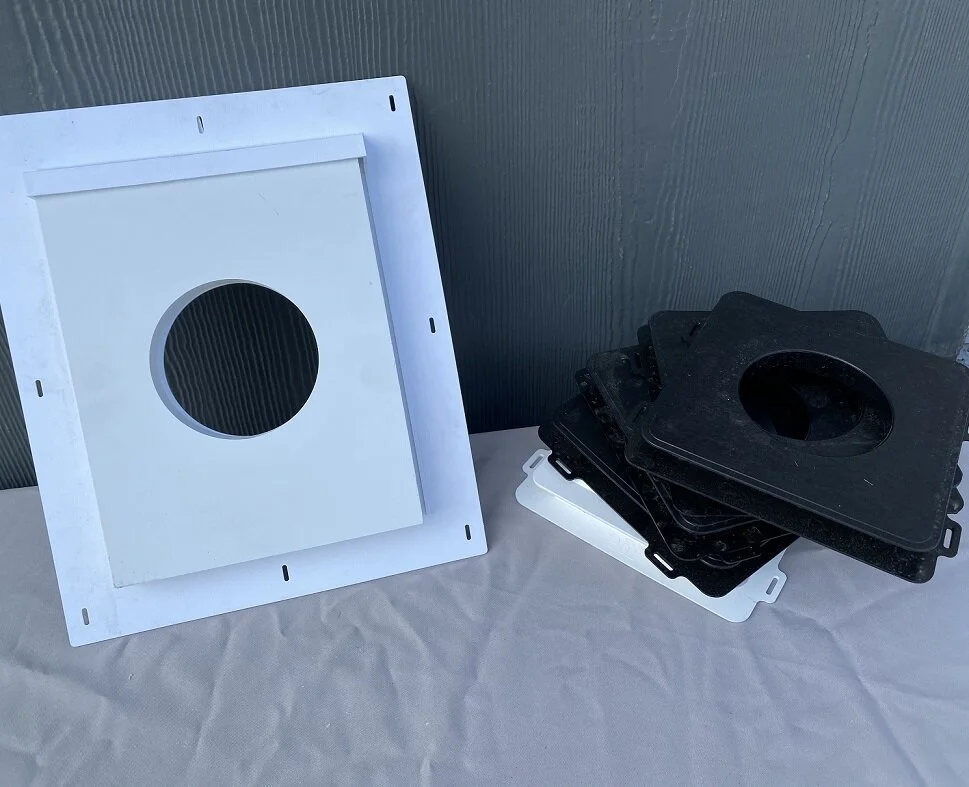
A SturdiMount light block costs about 5 times more than a common PVC mount
So, if PVC J-blocks are a good product for vinyl siding, do they also work for Hardie? From a technical standpoint, some of them do work if installed correctly. But from a design point of view, PVC J-blocks just don’t measure up to the SturdiMount.
On average, most homes will have between 8 and 12 mounts on the exterior of the walls: would you rather have your fixtures mounted to a solid block, or a flimsy bit of plastic?