The Right Way to Seal Around Windows
One of the major concerns that our customers all share is the potential for us to discover rotten wood under their siding. When we remove old siding or stucco from an exterior, we’ll find significant water damage on somewhere around 15% to 20% of houses. When we do find damage, one of the main causes is almost always the window seal.
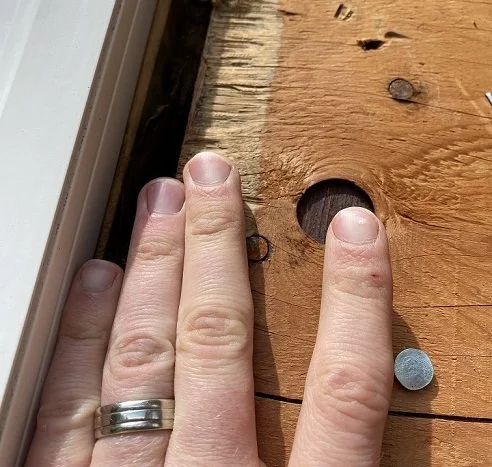
Typical water damage at a window
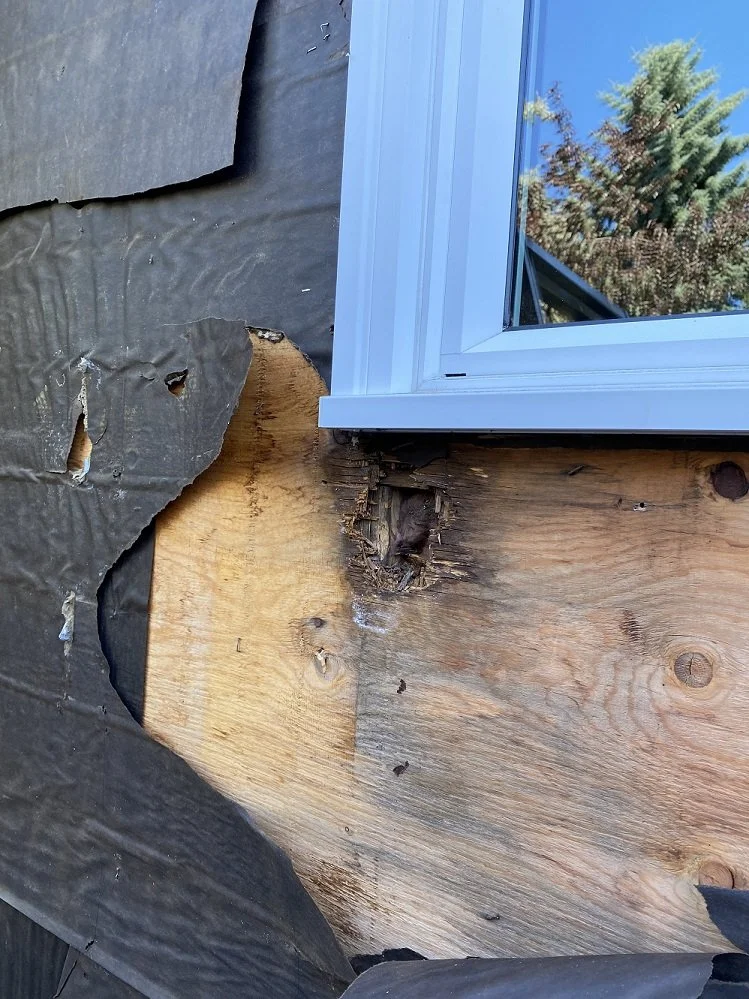
Here’s an example of typical water damage under a poorly sealed window. The plywood sheathing has rotted away to nothing, and the insulation and studs have been exposed as well.
Standard details for sealing around windows have changed drastically over the last 30 years or so - and for good reason. In the 1980s and early 1990s, almost every home was wrapped with black paper infused with tar, known as tar paper. Tar paper does a fine job of stopping water penetration in laboratory conditions, but on the wall is a very different story.
Tar paper has always come with a number of installation issues. In cold or windy conditions, it’s nearly impossible to avoid rips or tears. Wrapping tar paper around outside or inside corners takes far more fasteners than you would like to see, which means more holes in the water resistant barrier (WRB). And maybe most importantly of all, proper sealing to windows and doors is difficult at the best of times, and was simply not possible 30 years ago.
Sealing is an even bigger challenge when installing replacement windows. When a replacement window installer cuts out the old window and inserts a new one, they are usually forced to seal the window by caulking it to the face of the existing siding or stucco. This keeps some water out, but any moisture that gets behind the siding will almost certainly get in to the windows as well.
How do we solve these problems?
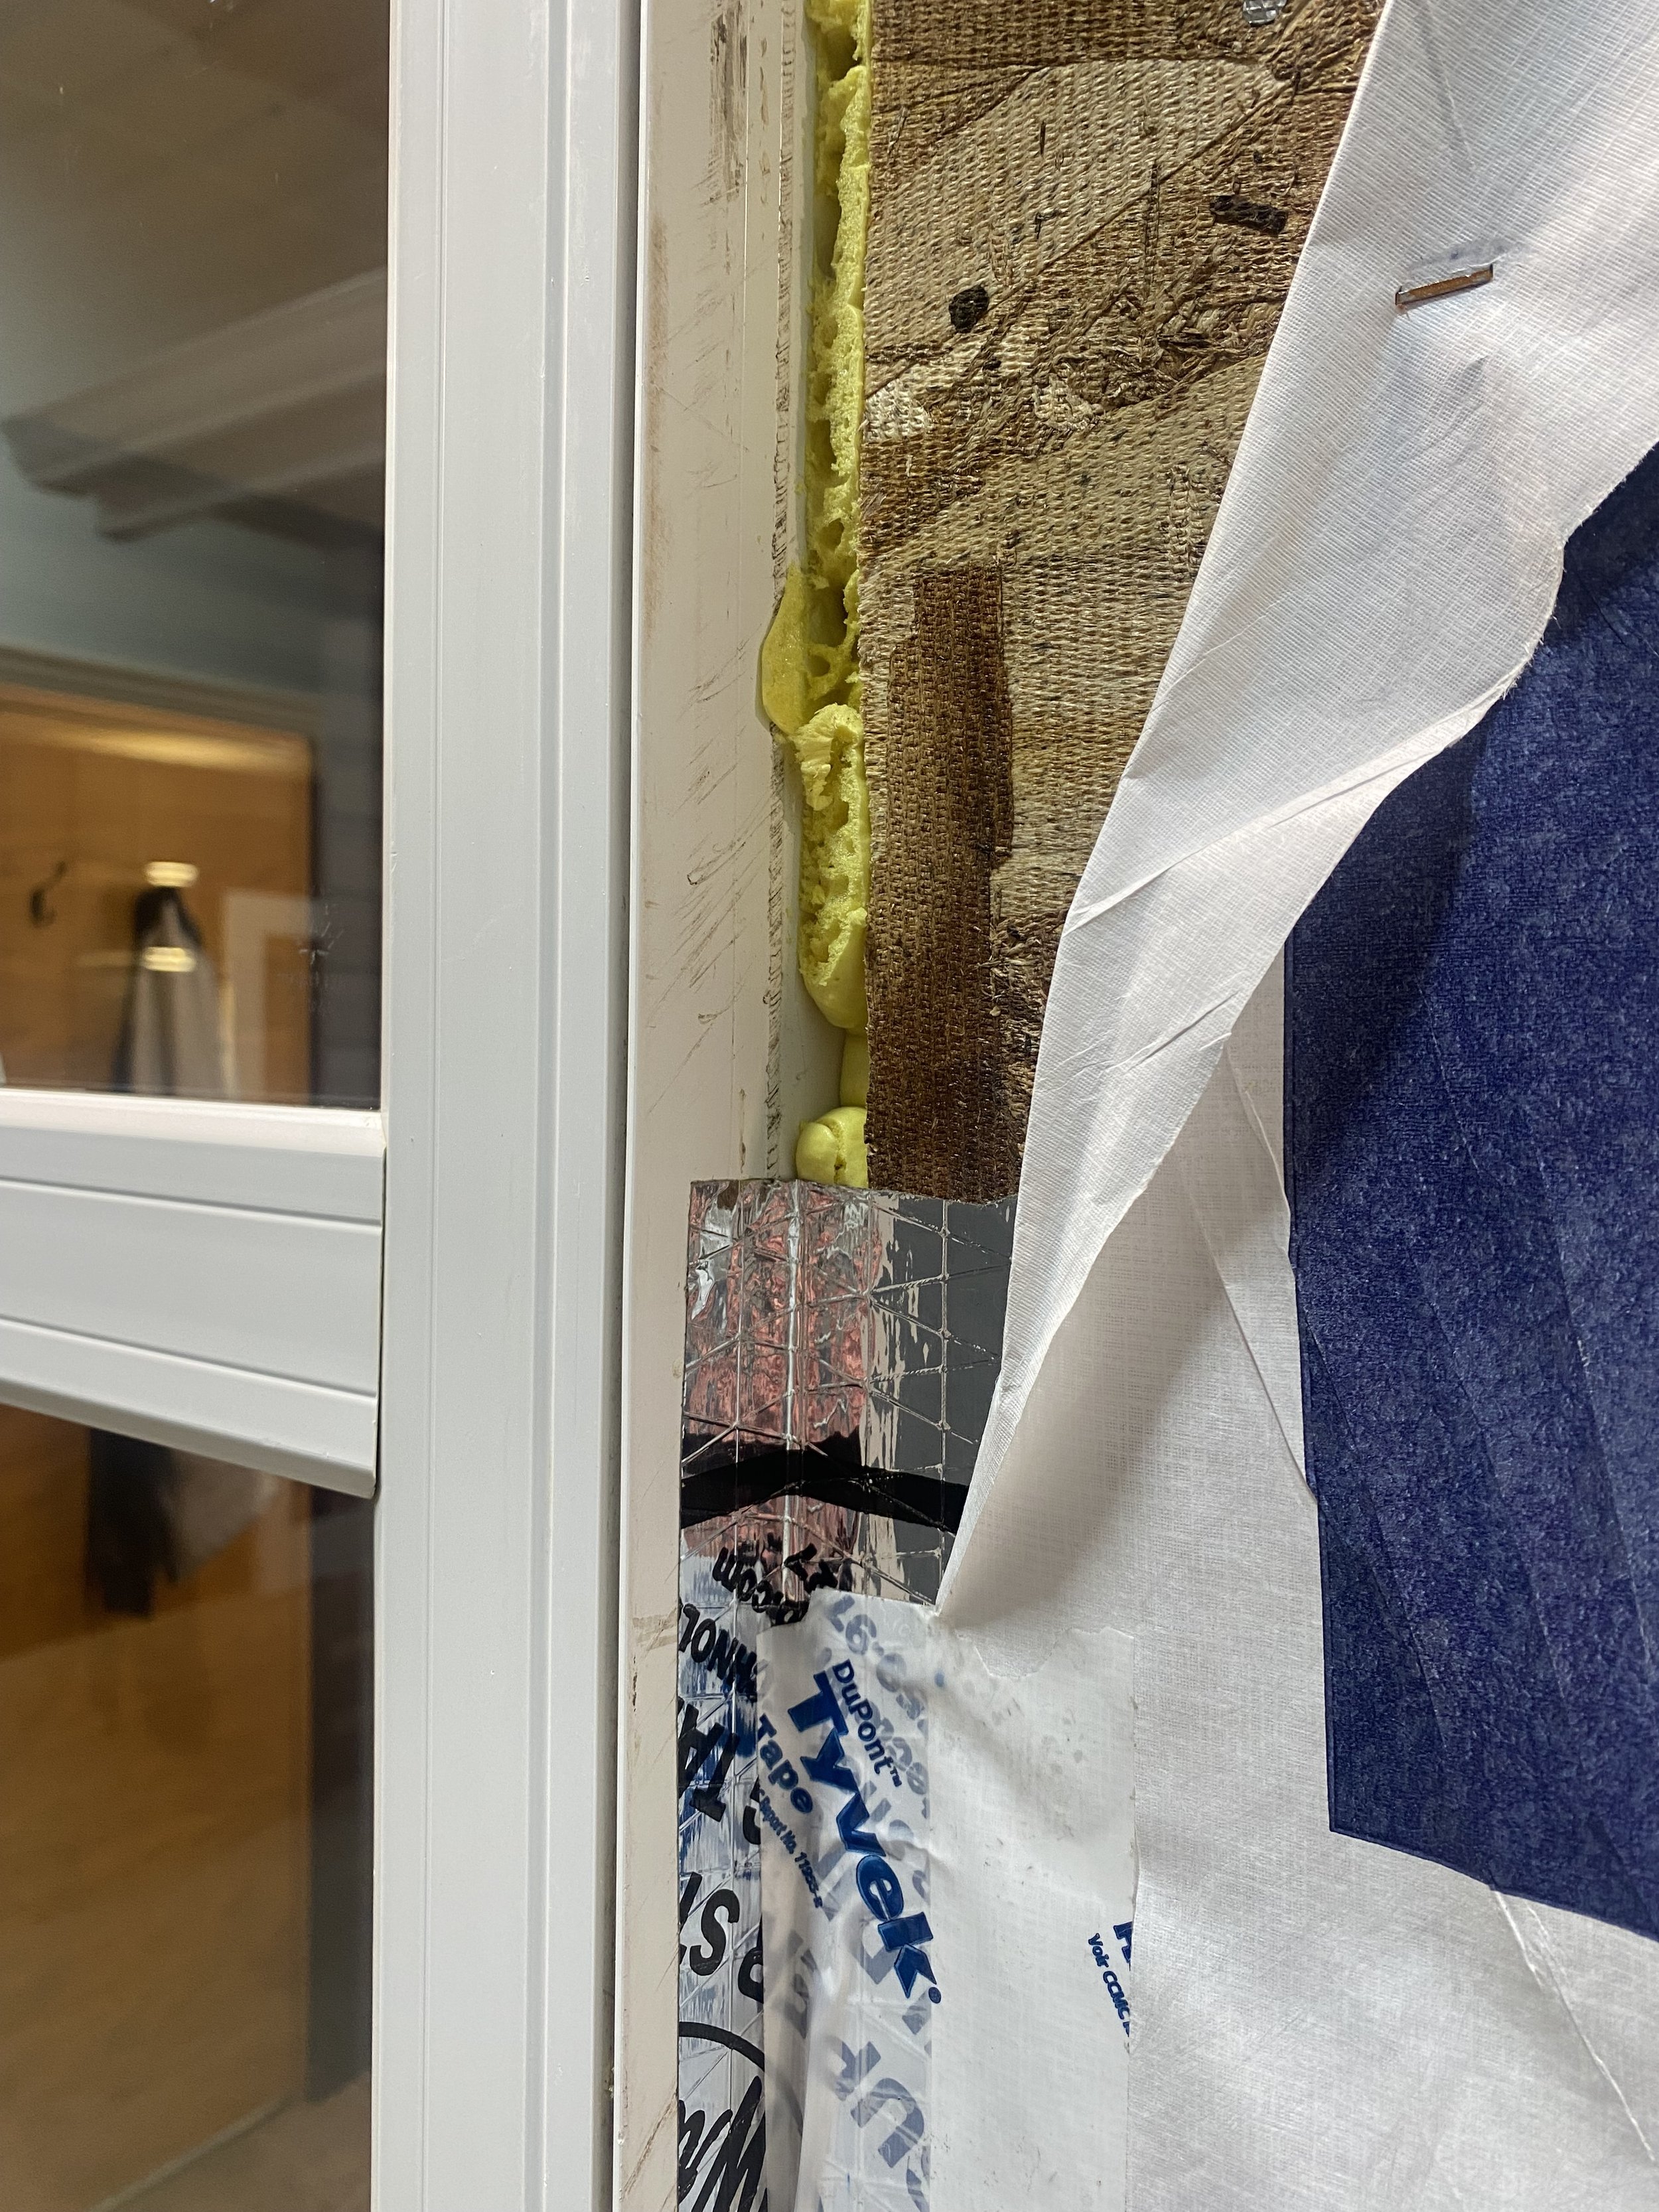
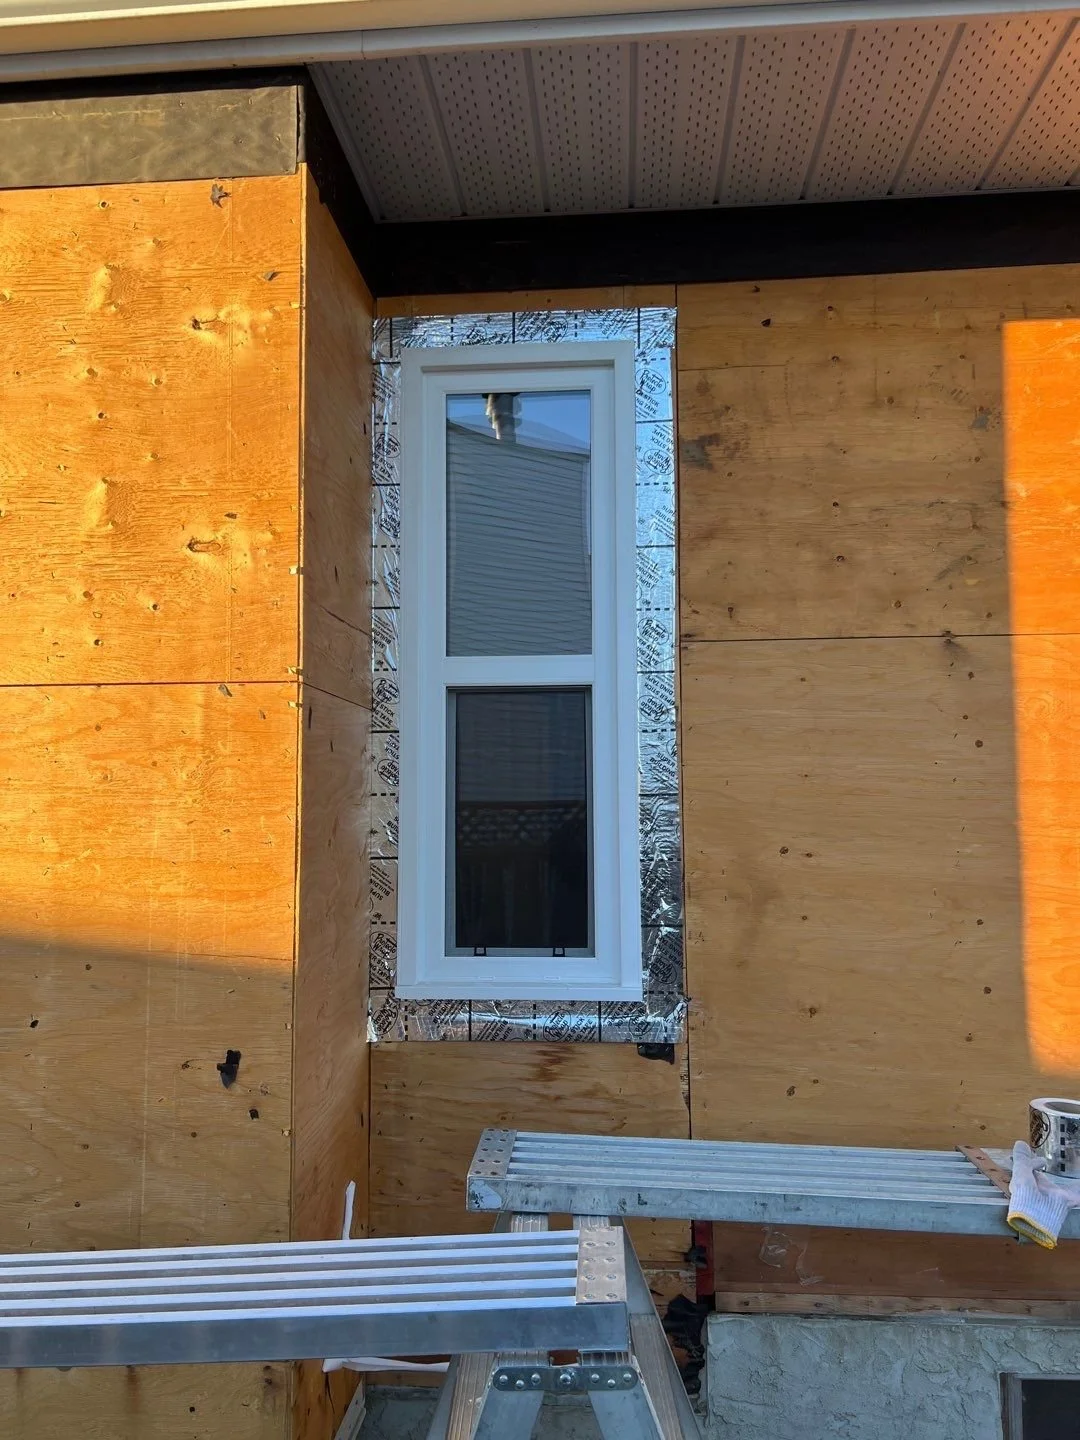
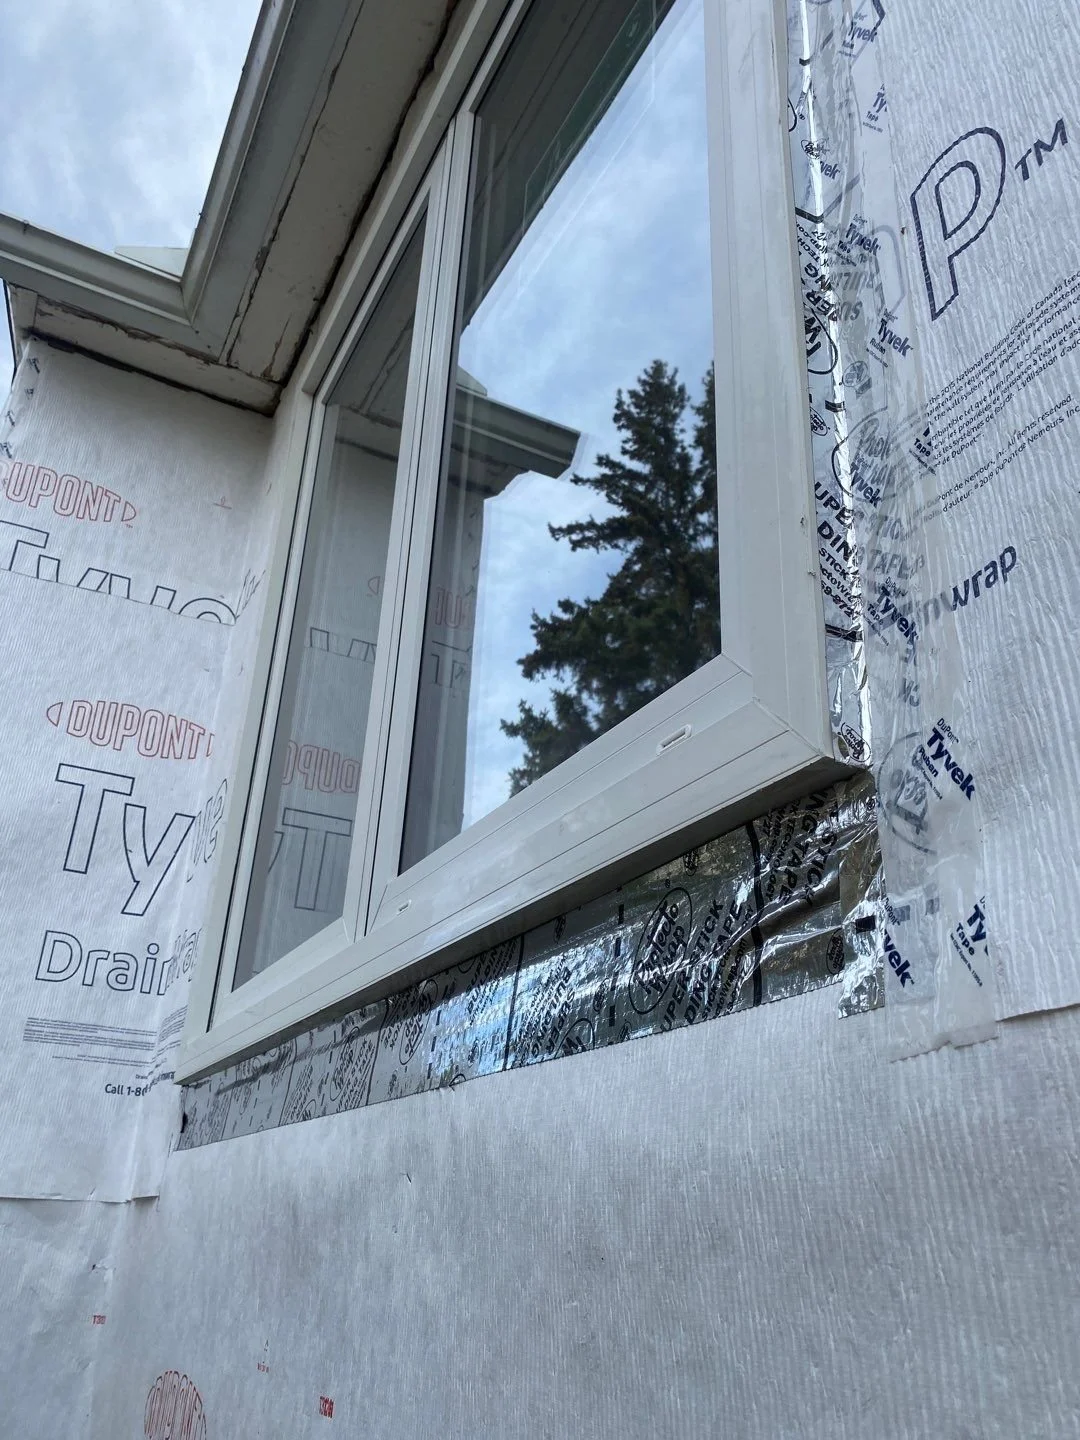
When we remove and replace siding for our customers, we always remove the old WRB at the same time. This allows us to install flashing tape, a super sticky 4” wide sealant tape with a peel & stick backing. Lastly, we use Tyvek tape to seal the Tyvek to the windows to keep out wind driven rain.
Good peel & stick tape provides a waterproof seal between the window and the wall sheathing. This way, even if something does allow water to get behind the Tyvek (such as an ice dam in the roof, or a sloppy vent penetration by a furnace installer), the water won’t get into the window opening.
We use Protecto Wrap super stick tape as our peel & stick flashing. They aren’t kidding when they call it “super stick tape”: once it’s on, it’s on. Protecto Wrap doesn’t require a primer, and it sticks just as well in sub-zero temperatures as it does on a hot summer day. In fact, we can use Protecto Wrap in temperatures as low as -28 degrees Celsius! Most other peel & stick products don’t work at all below 0 degrees Celsius.
Check out the pictures below to see step-by-step how we seal windows when we remove and replace siding:
Photo Gallery: Typical window sealing